How to Change a Tire in 7 Easy Steps

Being stuck on the side of the road with a flat can be intimidating. Especially if you don’t know how to change a tire. I once got a flat tire in the middle of the night, and I couldn’t call AAA, which meant I was forced to figure out how to change a tire just to get home.
I was lucky to have enough signal on my phone to be able to figure out what I had to do. If only I’d listened the many times my dad and fiancé had explained how to change a tire.
Don’t be like me—learn these steps for how to change a tire before you find yourself in a tricky situation so you will always be prepared.
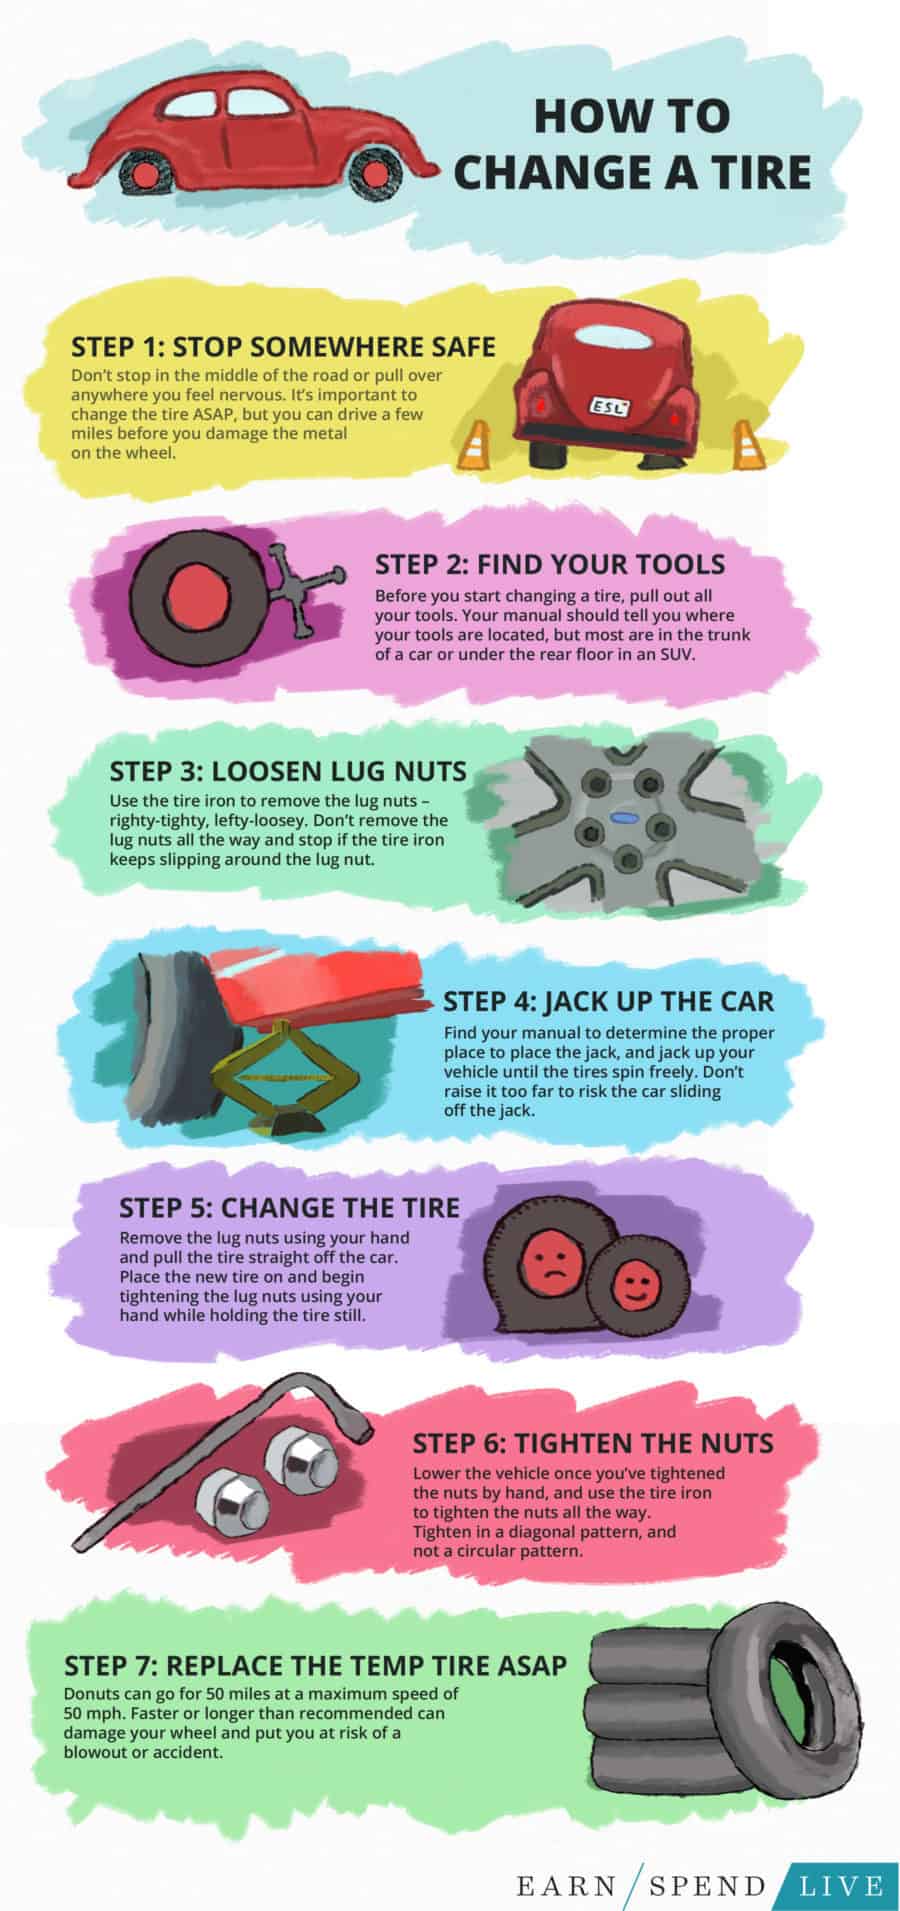
Step 1: Stop Somewhere Safe
Your safety is more important than a wheel.
I cannot stress this enough. Don’t stop in the middle of the road or pull over anywhere you feel nervous. It’s important to change the tire ASAP, but you can drive a few miles before you damage the metal on the wheel.
I got a flat tire on the way home from class one day (30 miles away) and didn’t find out until I was on the freeway. To me, stopping on the shoulder was dangerous, considering most vehicles fly by going 70+ mph. So I opted to take the next exit and drove to a gas station.
Wherever you stop, make sure the ground is level. Changing a flat tire on uneven ground can be a tricky experience. Chasing a rogue tire down the street just adds to your already spoiled day.
Step 2: Find Your Tools
If you drive a newer car, you should be able to find all the necessary tools and a spare tire under the floor of your trunk. Lift up the flooring, and you should see a spare tire, a diamond jack, and a tire iron.
Not every vehicle is made the same, and some may put the jack and spare tire in a different area. For example, some SUVs include the tools under the backseat. The manufacturer’s booklet will tell you the location of the jack and spare tire if it’s not in the trunk.
Used cars can be tricky because the tools could have been removed or broken. That just makes a bad day worse. Before purchasing a previously owned vehicle, make sure the tools are included and in good condition.
Getting all of the tools prepared, it’s sort of like mise en place for cooking—I like having everything within reach and planned out.
Step 3: Loosen the Lug Nuts
Before jacking up the car, you have to loosen the lug nuts, which are the things holding the wheel and hubcap to the car. Most of the time, they’re pretty tight, so using your hands just won’t work. That’s why you have a nifty tire iron that is designed to help remove lug nuts. Remember the old saying: righty-tighty, lefty-loosey.
The tire iron will help you use your body weight to loosen the lug nuts, but be careful not to remove them completely. The lug nuts will completely come off once the tire is off the ground.
While loosening, avoid stripping the nuts. This happens when the tire iron feels like it’s slipping from around the nuts. It creates a smooth rounded edge that can make the lug nuts impossible to get off, and you’ll end up having to call a tow truck. I had this happen, and towing wasn’t included in my car insurance, so I had to pay to have the tow truck take me to the nearest mechanic right on the spot.
Step 4: Jack Up the Car
This step may seem scary, but the jack does most of the work. The jack goes in a specific spot, and putting it in the wrong spot can damage the body of your car. Some vehicles have a little notch under the car near the wheel that lets drivers know exactly where to put the jack, but if there’s no mark, the vehicle guidebook can help.
The first time I tried to jack up my car, I placed it next to the tire. Spoiler alert: it was the wrong spot, and I cracked the body of my car. I let it down immediately and eventually found the right spot, but the damage was already done.
The jack should easily hold the car when you begin twisting, but you might hear some cracking sounds. Don’t be alarmed—these sounds are perfectly normal. But if the body seems to be under a lot of pressure, lower the vehicle and try again.
Continue to jack up the car until the tire spins freely. You want enough room to work, but not too much room where the car risks falling from the jack.
Step 5: Change the Tire
The lug nuts are already loosened, which means you just have to unscrew them the rest of the way using the tire iron or your hands. Finally, pull the old tire straight off. It’ll be pretty heavy, so be prepared to support the weight of the tire.
With the old, flat tire removed, the new one is ready to be placed onto the vehicle. While holding the tire still with one hand, begin to hand-tighten the lug nuts with the other as much as you can. With all the lug nuts in place, begin to lower the car to rest on the tire with the hand-tightened nuts.
Step 6: Tighten the Lug Nuts
The final step is to tighten the lug nuts with the tire iron. Make sure the car is completely on the ground before beginning. The lug nuts should be tightened in a diagonal pattern. Tighten the first one, then move diagonally to the next. Avoid a circular pattern. Tighten the lug nuts as much as you can using the tire iron and as evenly as you can. This helps prevent wobbling while driving and keeps the tire from falling off.
Step 7: Replace the Temporary Tire ASAP
Some spare tires are called a “donut”, which is a smaller spare tire designed for short distances and lower speeds. These types of tires need to be replaced as soon as possible. They’re only made to only go a maximum of 50 miles at a speed of no more than 50 mph. I was taught 50/50 to remember exactly how far I can go and how fast. Going faster or farther than recommended can damage your wheel and put you in serious danger of a blowout or accident.
Last modified on May 25th, 2023


Show Comments +